Put in the good stuff

What better way to make veggies taste extra good, but still maintain their natural taste? With cheese and inside something else. Introducing a dish that is both healthy, filling, AND full of all the good stuff: Broccoli and Parmesan stuffed chicken with Tarragon oil. 

The best part about this meal is that you don’t loose the fresh taste of the broccoli within the chicken. Instead, every bite is full of a little crunch and smoothness with the Parmesan cheese. The homemade Tarragon oil adds moistness and flavor to the chicken and every bite is a little pocket of heaven.

Ingredients

  • 1.5 lbs. skinless boneless chicken
  • 1 large head of broccoli
  • 1 cup shaved Parmesan cheese
  • 2 tablespoons extra virgin olive oil
  • 5 fresh sprigs of tarragon
  • 1/2 tablespoon of salt
  • 1/2 tablespoon of pepper

Shopping List

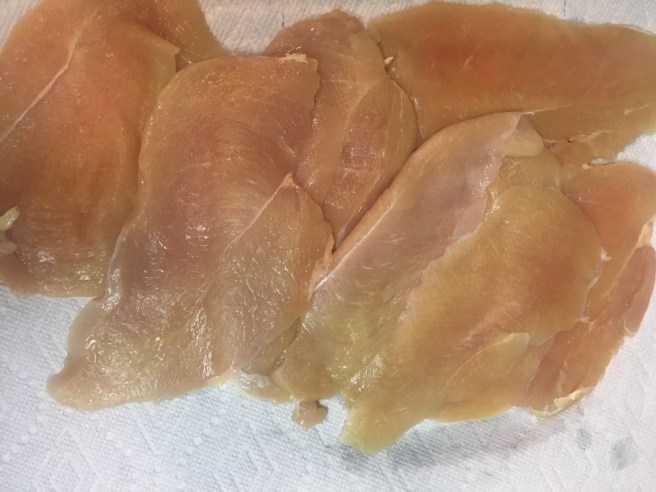
  • Chicken: my recommendation is to buy the thinly sliced (already pounded) chicken breasts for easy rolling. The alternative is to buy full sized plump chicken breasts and pound them yourself at home. For ease, look for the thinly sliced.
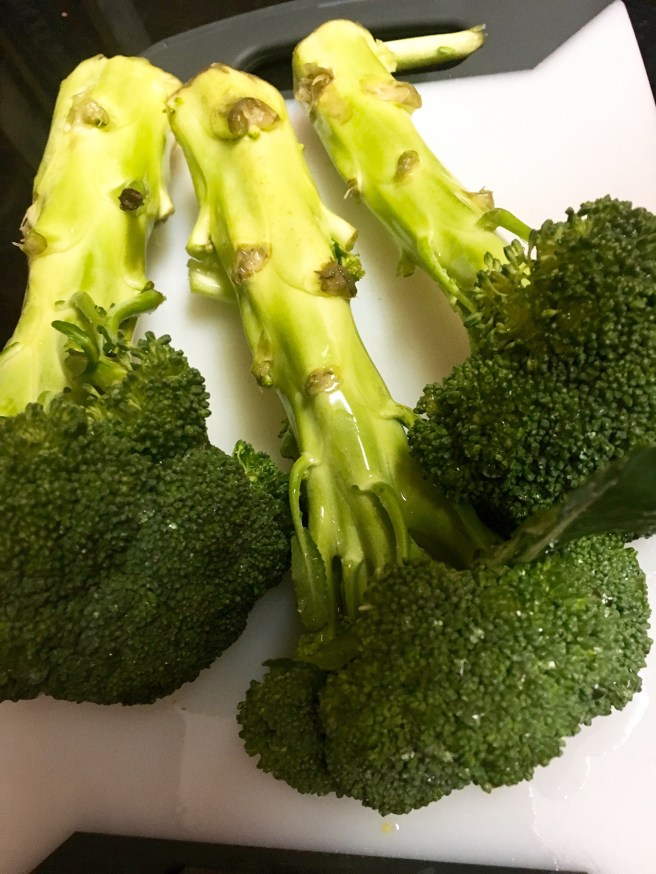
  • Broccoli: just go to your fresh produce section and pick out the healthiest sized head of broccoli. Usually 1 head of broccoli includes about 3-4 stalks (a stalk is the equivalent to what looks like a “tree”)
  • Parmesan cheese: I like to grate my own cheese from a block of cheese vs. the pre-packaged and already shaved. It’s up to you.
  • Tarragon: also in your grocery store’s produce section, you should be able to find small containers of fresh herbs. I recommend buying your tarragon from here. The containers are plentiful with the herb and will make it more simple for you when extracting the tarragon leaves for the homemade oil.

Recipe

First, preheat your oven to 375 degrees. Prepare a glass baking dish (a dish, not a shallow pan) for the chicken by lightly spraying with cooking oil. Set aside. Also, measure 3 cups of cold water (lightly salted) and put in a pot to boil on medium to high heat (this will be for the broccoli).

Next, remove the chicken from it’s packaging and rinse piece by piece in cold water. Line a cutting board with a few sheets of paper towel and pat dry the chicken and place on the plate after you’ve washed each piece. Don’t stack the chicken, but lay the pieces side by side. After you’ve finished rinsing and drying the chicken, liberally salt and pepper each piece.

chicken-prep
Washed and dried thinly sliced chicken breasts

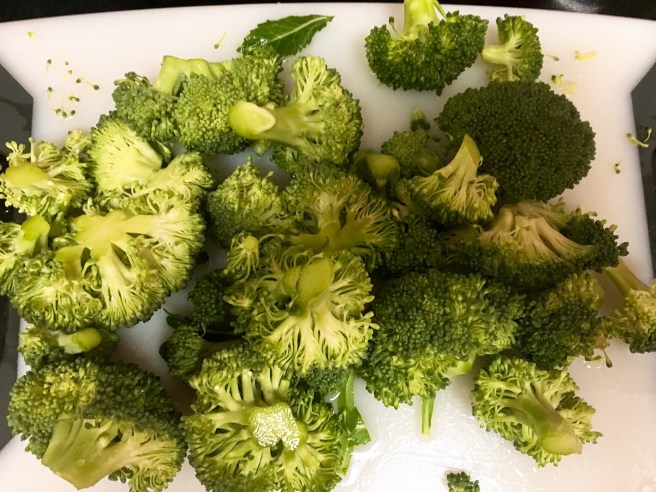
Set aside the chicken and now on to the broccoli cheese filling! Take the head of broccoli you bought and rinse it in cold water. Next, cut off the thick stem so you’re working with only the heads. Take a sharp knife and cut the broccoli into approximately .5 inch/small pieces. However, make sure the broccoli stays in tact and doesn’t get too flakey and loose it’s shape.

broccoli-head
Broccoli stalks
broccoli-cut
Cut broccoli heads

By this time, the water you placed on the stove should be boiling. Reduce the heat to a simmer and drop in the broccoli for approximately 7-10 minutes, until tender. Keep uncovered; the broccoli should float and you can stir it occasionally.

Remove the broccoli, put in a strainer, and run under cold water over it for 5 seconds. This trick is to a) help the broccoli keep it’s bright green color, and b) maintain the crispness and flavor of the broccoli. Transfer the broccoli to a medium sized mixing bowl.

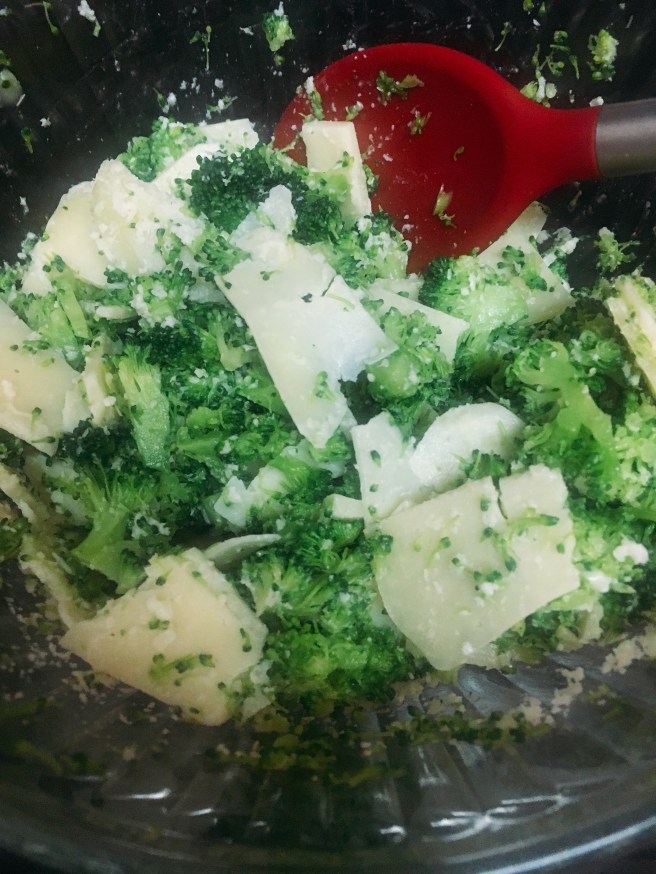
On to the Parmesan cheese. Measure out 1 cup of shaven cheese – either use the pre-shaved that you bought of use a cheese grater yourself. If you decide to use a cheese grater, be careful of your fingers and don’t rush!

Once you’ve measured out the 1 cup of cheese, lightly mix in with the broccoli. Add a pinch of salt and pepper at the end and set aside.

brocooli-with-cheese
Broccoli and cheese goodness

Now, on to the “putting-it-all-together” part! On a clean and wide counter surface line up the following in this order from left to right: Broccoli and cheese mixture in a bowl, thinly sliced salt and peppered chicken breast on a plate, and the pre-greased glass baking dish.

Step 1: use your hands to gather a small handful (approximately 2 golf balls sized) of the broccoli cheese mixture.

Step 2: Lay the mixture in the middle of the chicken breast

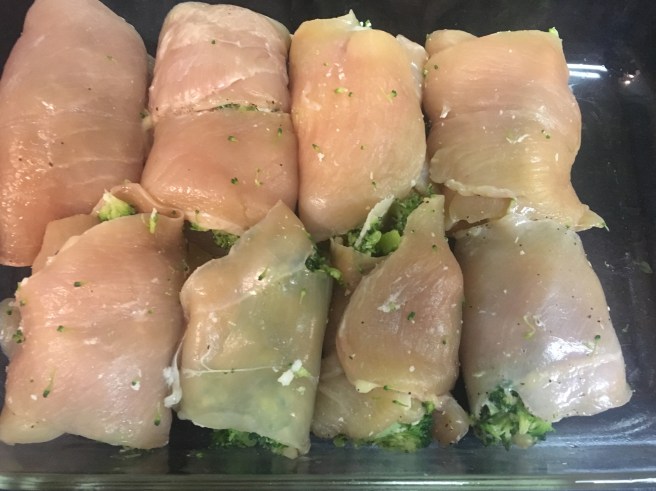
Step 3: Roll the chicken length wise, from one end to the other (you’ll likely be able to roll it about 1.5 – 2 times on top of itself. Also, the chicken should stay together pretty well and the broccoli cheese mixture should stay compact inside.

Step 4: Place the rolled up piece of chicken in the dish, starting at one end of the dish and working your way to the other. Important: place the chicken face down on the place the two ends of the chicken meet so that it won’t unravel as it bakes.

Repeat steps 1 through 4 until you have used all the chicken and you’ve filled the dish that is now almost ready go into the oven.

stuffed-chicken
Chicken rolls with broccoli cheese mixture inside

The final preparation step is the Tarragon Olive Oil. This is very simple.

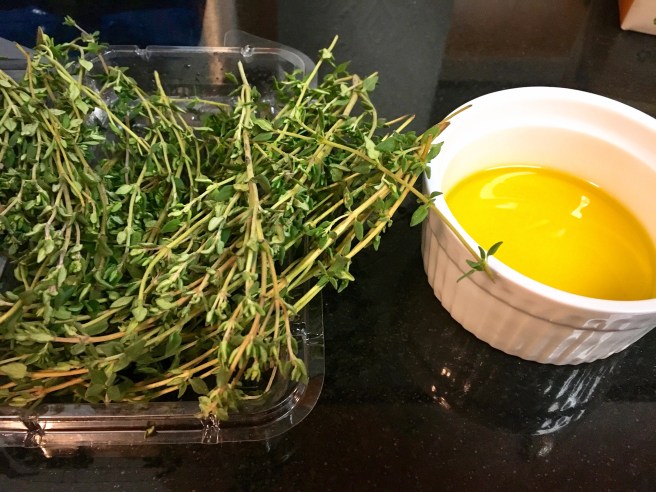
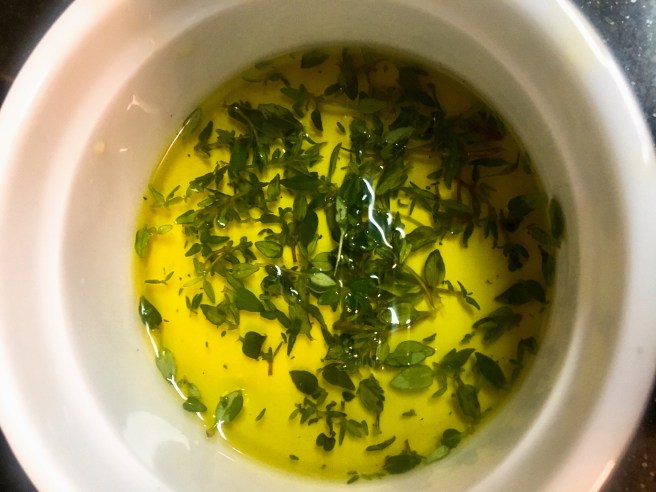
First, measure out 2 tablespoons of the extra virgin olive oil and put into a small dish. Next, take the dried tarragon and with your fingers pinch off the tiny leaves and let fall into the oil. Use your judgment as to how concentrated you want the oil (i.e. how tarragon-y you want it to taste). Add a pinch of salt and pepper and mix.

taragon-and-oil
Fresh sprigs of tarragon and extra virgin olive oil
taragon-in-oil
Combined tarragon leaves with extra virgin olive oil

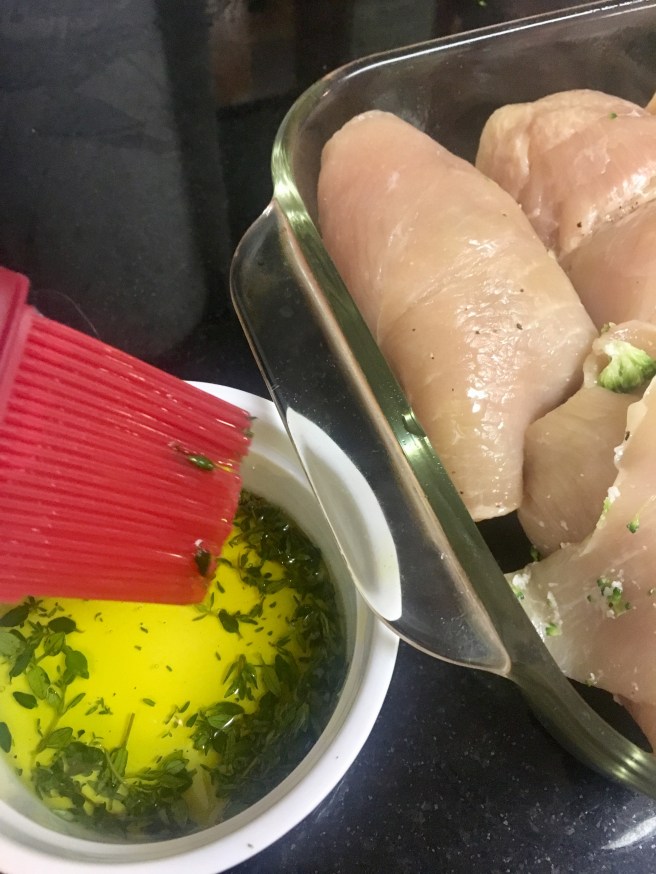
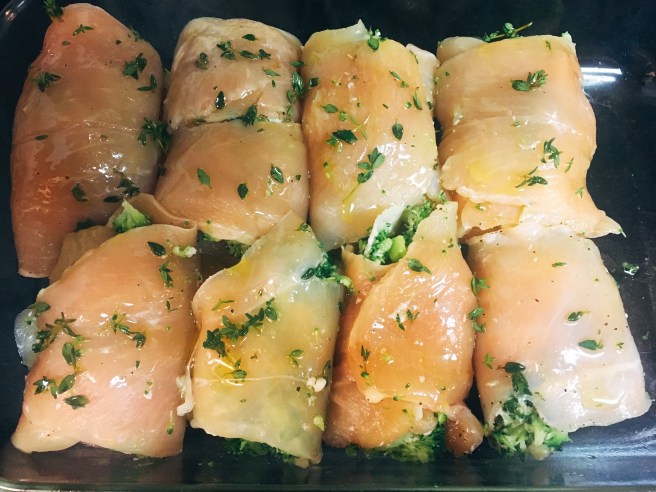
Next, and finally, take a “kitchen paint brush” (as pictured below) and dip into the tarragon oil. Lightly drizzle/paint each rolled up piece of chicken in the glass bowl.

painting-chicken
Paint brush and canvas ready to go!
painted-chicken
“Painted” chicken with tarragon oil

Place the glass baking dish with the chicken in it in the oven and set the timer for 25 minutes. At that point, carefully cut into one piece using a fork and knife and check that the chicken is not translucent or pink. If it seems cooked through and white, it’s time to take it out!

This dish works well with a side of roasted carrots and rice. Those recipes to come in future posts so stay tuned! But in the meantime, enjoy your broccoli and cheese stuffed chicken. It’s so easy to make with few ingredients but quick to impress – a great dish for hosting, especially when you want to go light on the fat and heavy on the veggies! Makes for the staple of a healthy meal all around. Enjoy!

digesting
“Who knew that explosion of broccoli and cheese in my mouth would be so delish! Now I sleep”


New Year’s Kickoff!

What better way to start a blog? By celebrating one of my most favorite dishes with my closest friends and out-of-this-world special boyfriend, David – on New Year’s Eve, no less! This post is dedicated to the gift sharing food with loved ones, and to thank David for this most special 29th birthday present. Thank you for paving the path of support for my pursuing a cooking blog, which we know I’ve been talking about for a very…long…time.

I was first introduced to the below recipe by David after he emphatically said this was one of HIS favorite dishes: Chicken and Basil Roulades with Mustard Sauce. This is a recipe out of the always reliable and beautifully illustrated Willams-Sonoma Chicken cookbook. (More to come in future posts about the significance for me of this often wrongly classified “bland” food, chicken).

As someone who is often times too comfortable with planning and details, it’s exciting (but also daunting) to have a literal blank page ahead of me. Funny enough, I’m actually inspired and curious to see how the blog evolves and what will naturally unfold from not having a plan. That is to say, I don’t have a predetermined format, writing style, or theme of posts that fits into a box. Similarly, my recipes are different than what you might find in a book because they are tested, tweaked, and tell a story. If I can promise you one thing, each and every recipe on here is carefully selected, made my me, and meant to also bring joy to you as it has to me. Happy reading/eating!

Sauce Ingredients

  • 1/2 cup plain yogurt
  • 1 tablespoon Dijon mustard
  • 2 teaspoons chopped fresh chives

Chicken Ingredients

  • 2 tablespoons unsalted butter, melted
  • 2 tablespoons chopped fresh basil
  • Boneless chicken breast (approximately 1.5 lbs)
  • Salt and pepper
  • 1/3 cup plain yogurt
  • 1 teaspoon Dijon mustard
  • 1 cup plain bread crumbs
  • 1/2 cup grated Parmesan cheese

Shopping List

  • Large container of Danon Natural Plain Yogurt (32 oz) (low-fat or non-fat, if you prefer; won’t change the taste too much)
  • Small container of yellow Dijon mustard (I recommend the real stuff, like Maille or Grey Poupon; stay away from the artificially yellow hot dog stand mustard – it’s wise to splurge on good quality mustard because the taste really affects the recipe)
  • A small bundle of fresh chives from the grocery store’s produce section (stores also sell prechopped chives in a glass container – fine, too, if you want to save the step of chopping)
  • One stick of unsalted butter
  • 2 small containers of basil, prepackaged in a plastic container in the produce section
  • 1.5 pounds, approximately, of chicken breast (I recommend buying thinly sliced because you will be rolling the chicken tightly. Otherwise, buy regular sized breasts and pound to 1 cm thickness)
  • Tall cylindrical container of bread crumbs (I always stick with Progresso, “Plain”)
  • Plastic container of Parmesean cheese (I recommend the standard BelGioioso brand)

Recipe, with a pinch of Lizzie’s interpretation

First, the sauce: In the serving bowl you want to use alongside the meal (to save dish washing), stir together about 1/2 cup plain yogurt and 1 tablespoon of Dijon mustard. The sauce is one of the best parts of the dish (especially good to have with rice on the side), so I like to make extra. Up to you the proportions for yogurt:mustard based on taste.

Next, rinse the chives and place on a cutting board. Chop them into small pieces that will go into the yogurt and mustard sauce you just made. It’s OK to not be perfect with the exact measurements – the sauce is where you have the most wiggle room.

Once you’ve finished chopping the desired amount of chives, stir into the yogurt mustard sauce and set aside. This may seem counter intuitive to not refrigerate, but we want the sauce to be room temperature.

Next, preheat the oven to 400°F.

Prepare a baking sheet by putting tinfoil to cover it (again, less cleanup). Melt the approximately 2 tablespoons of butter in a microwave-safe dish. Then, brush about half of the melted butter onto the tinfoil sitting on the baking sheet. It is very helpful to have a rubber bristled cooking brush here. Alternatively, you can spread the butter by pouring a little and using a small piece of Saran Wrap to coat the tin foil.

Next is the best part! Chicken-Time and Assembly Line-Time.

Take the basil and pull off the leaves from the stem. Place on a cutting board and chop into small pieces (not as small as the chives). Put to the side.

On a dinner plate, pour approximately 1 cup of the bread crumbs and 1/2 cup of the Parmesean. Use your hands to gently mix together.

Next to this now prepared plate with crumb mixture, set out a large bowl where you will mix 1/3 cup yogurt with 1 tablespoon of mustard. I actually like doubling the recipe so if I run out of it, I don’t need to stop the Assembly Line mid-way and replenish. Unlike the sauce you made, this mixture does not include chives.

Next, take the chicken out of its package and rinse with cold water and pat dry. Lay out the breasts on a cutting board and lightly salt and pepper each side.

Wash your hands! Can never be too careful with extra washing around chicken.

Now to the Assembly Line and final step. Lay out in this order from right to left: salt and peppered chicken on the cutting board, basil leaves on their own cutting board, yogurt mustard mixture in the bowl, bread crumb and cheese mixture on the plate.

The process: 1. Put a healthy pinch of basil in the center of the chicken breast. 2. Roll the chicken breast the long way, starting on the right and tightly wrapping it around the basil. 3. Carefully dip the chicken wrapped basil in the yogurt mustard mixture. Make sure to healthily coat. 4. Roll the chicken now drenched with the yogurt mustard mixture in the bread crumb and cheese plate. Again, make sure to completely coat (this step is not, and will not, be perfect! Each chicken breast has its own shape and will look different once coated than the next. 5. Carefully transfer the coated chicken to the baking tray you prepared. 6. Repeat the process with the remaining chicken. 7. Once all the chicken is on the baking tray, drizzle the remaining melted butter on the top of each breaded, wrapped chicken roulade.

Bake for approximately 30 minutes at 400°F, or until the bread and cheese crumble is golden brown and the chicken is no longer pink.

Wait 3-5 minutes before serving. I recommend serving with a large spoonful of the yogurt-mustard-chive sauce (now room temperature). Don’t forget that you set this aside! I also suggest serving with white rice and a simple salad. The chicken combined with the rice and sauce is…well…you’ll have to taste for yourself .

Lizzie’s Extra Tips:

  • After you lay out what I call the “assembly line,” I suggest handling one piece of chicken at a time, from the basil stuffing through to the last step of putting it on the baking sheet.
  • The chicken may seem to unravel as you’re taking it down the line, but don’t worry. Try to make the rolls as tight as possible and hold together while dipping in the yogurt mixture and bread crumbs.
  • The best way to get a consistently even textured crust on each chicken roll is to wash your hands between dipping the chicken in the yogurt mixture and then in breadcrumbs. This way, the bread crumbs won’t get clumpy from the yogurt on your fingers. You can have a helper in the kitchen to turn on and off the water so you can wash your hands in between each piece of chicken, which is a helpful tip in the kitchen anyway when handling chicken and staying sanitary.
  • One of the most tasty parts is the bread and cheese crumb coating that will inevitably dribble onto the baking tray. Don’t let this go to waste and scoop this up to add to your plate. Delish!
  • Perfection isn’t attainable with this recipe. Part of the fun is actually working with different cuts of chicken every time and each roll will have its own personality!